Introduction
Note: This feature is part of the Visforms Subscription and is not included in the free Visforms version.
The field placeholders under the “Data selection” tab refer to the table fields of the data table of the form. Only the user ID is stored in the table field “created_by” of the data table of the forms.
All other additional information, from other tables of the Joomla database, must be queried with its own additional SQL statement. The data fields of this additional SQL statement can then be used in the PDF template. This also includes all other user information that is stored in the Joomla database.
Starting point
The PDF template is straightforward and simple, as described in this section of the documentation: Structure and Operation.
Secondary SQL statement is required
So far, the PDF template has done without the advanced SQL features (secondary SQL statements). However, such a secondary SQL statement is always necessary if data from a database table other than the form data table is to be displayed in the PDF.
Create secondary SQL statement for the PDF template
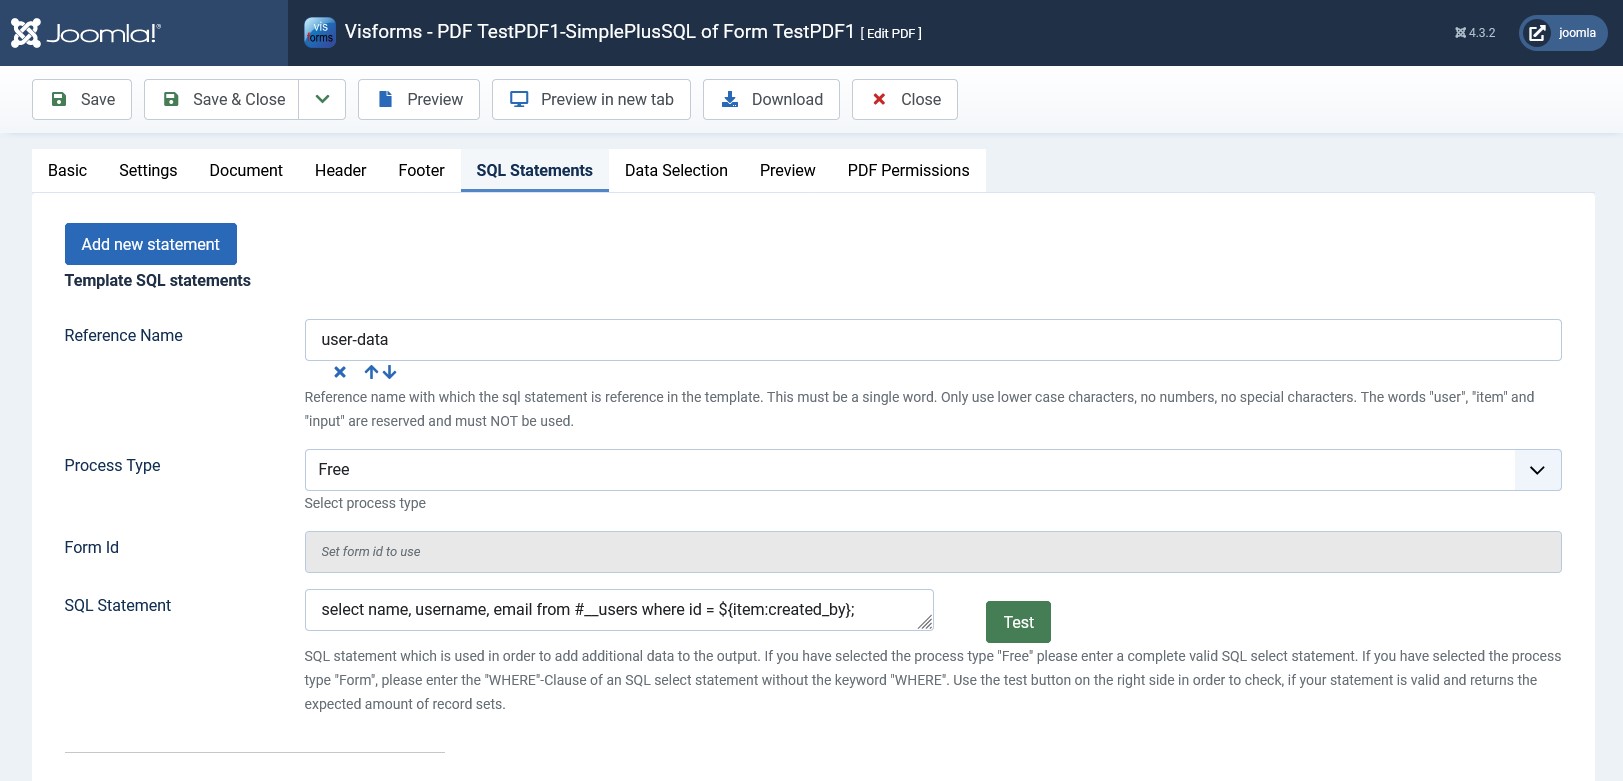
Define a small secondary SQL statement for the PDF template on the “SQL Statements” tab, which queries the desired user data from the Joomla user table:
- Tab “SQL Statements”, “reference name” = “user-data”
- Tab “SQL statements”, “Process type” = “Free”
- Tab “SQL Statements”, “SQL statement” = “select name, username, email from #__users where id = ${item:created_by};”

The secondary SQL statement is re-evaluated for each data record in the form when the PDF template is processed.
When evaluating the secondary SQL statement per data record of the form, the fields of the current data record of the form can be accessed with placeholders.
select name, username, email from #__users where id = ${item:created_by};
Note: The expression item is a static name that refers to the current record of the form.
Note: The expression created_by is the name of the record field of the form.
Note: The table name of a table in a Joomla database always has a so-called table name prefix, which is placed in front of all Joomla table names within a Joomla instance. You don't have to know the table name prefix or write it explicitly. Instead, use Joomla's own placeholder for the table name prefix: #__.
Insert text with placeholders for the secondary SQL statement
Insert the desired free text with the placeholders into the PDF template. The insertion must be done within an HTML element. Otherwise there would be no way to specify that a “secondary SQL statement” should be evaluated at this point.
The p element is very suitable for this example. In principle, all other HTML elements are also possible. Another very simple HTML element is the span element.
<p id="user-data" class="sql">The form data was submitted and created by the following user:<br />
name = ${user-data:name}<br />
username = ${user-data:username}<br />
email = ${user-data:email}</p>
Note: The expression class="sql" indicates that a secondary SQL statement is to be evaluated and applied to the placeholders.
Note: The expression id="user-data" is the reference name of the secondary SQL statement to be used.
Note: The expression ${user-data:name} is a placeholder for the select field 'name' from the secondary SQL statement with the reference name 'user-data'.
See the documentation for the PDF feature for more explanations.
More in:
Bind secondary SQL statements to an HTML element.
The “Test” button
With the ‘Test’ button, you can check before actually generating the PDF document whether the SQL statement is at least error-free and how many results it delivers. However, the ‘Test’ button can only be used if there are no placeholders in the SQL statement. The placeholders in the SQL statement are only replaced later at runtime. When you click the “Test” button, a placeholder is not replaced, causing an SQL format error. A corresponding error warning appears.
This SQL does not produce an error:
select name, username, email from #__users where id = 234;
Where the random value ‘234’ is the ID of an existing Joomla user.
This SQL produces an error:
select name, username, email from #__users where id = ${item:created_by};
We therefore recommend developing the SQL statement with fixed values first. Only towards the end do you insert the desired placeholders in the necessary places, when everything else is already working correctly.
For somewhat larger and unwieldy SQL statements, we recommend developing and testing in an environment explicitly designed for this purpose. These include the “MySQL Admin” or a dedicated development environment (IDE). In this case, too, only insert the desired placeholders at the end, in the necessary places, if everything else is already working correctly.
The document part of the PDF template
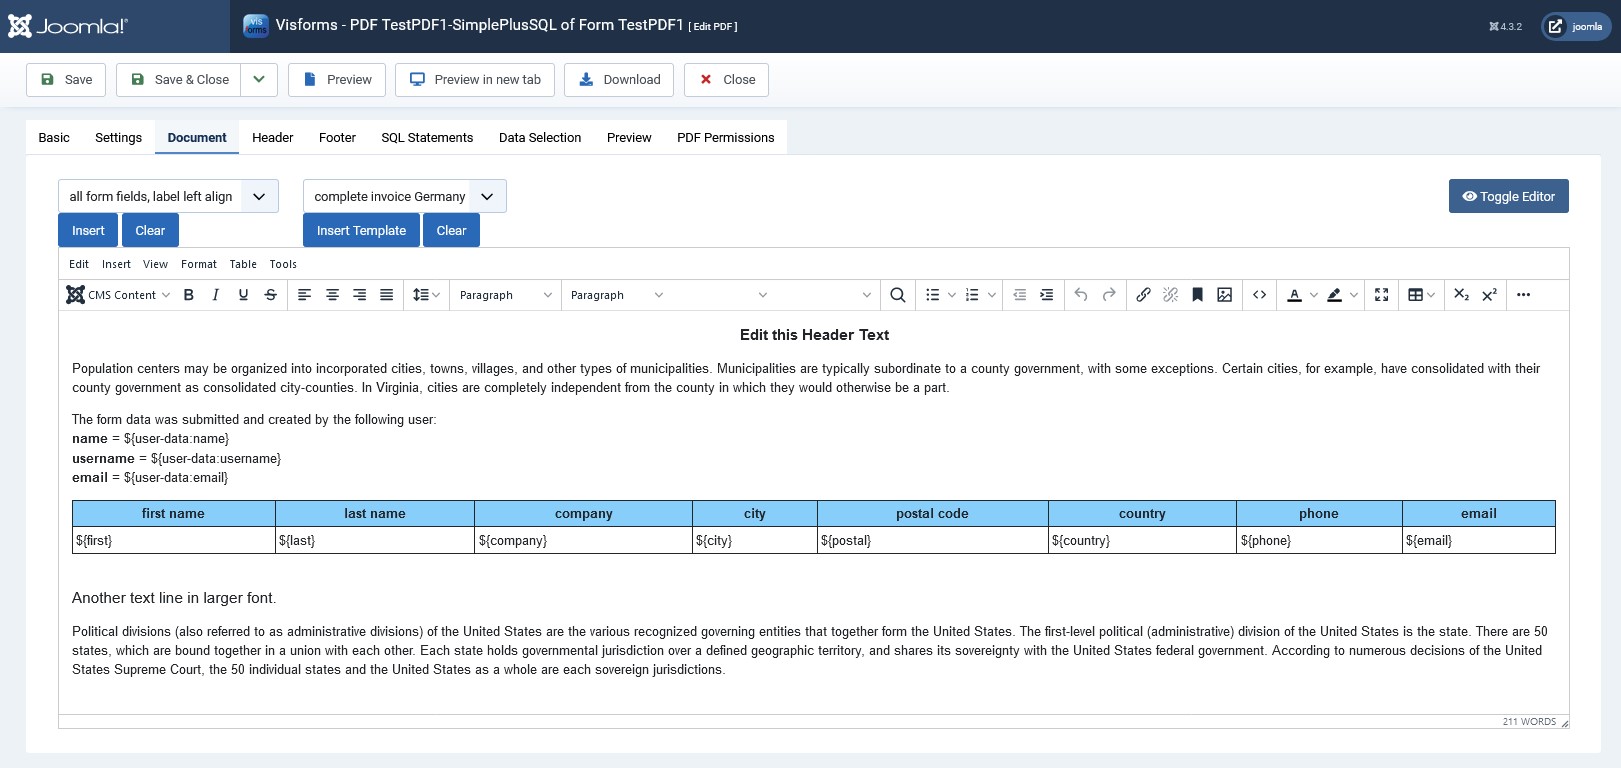
The document part of the PDF template looks like this after inserting the text with the placeholders for the secondary SQL statement.

To edit the document part of the PDF template, you can switch off the editor.
To switch between the view with and without an editor, click the “Editor on/off” toggle button.
<p style="text-align: center;"><span style="font-size: 14pt; text-align: center;"><strong>Edit this Header Text</strong></span></p >
<p>Population centers may be organized into incorporated cities ...</p>

<p id="user-data" class="sql">The form data was submitted and created by the following user:<br /><b>
name</b> = ${user-data:name}<br /><b>
username</b> = ${user-data:username}<br /><b>
email</b> = ${user-data:email}</p>

<table width="100%" cellpadding="4" border="1">
<tbody>
<tr style="font-weight: bold; background-color: lightskyblue;">
<td colspan="1" align="center">first name</td>
<td colspan="1" align="center">last name</td>
<td colspan="1" align="center">company</td>
<td colspan="1" align="center">city</td>
<td colspan="1" align="center">postal code</td>
<td colspan="1" align="center">country</td>
<td colspan="1" align="center">phone</td>
<td colspan="1" align="center">email</td>
</tr>
<tr>
<td colspan="1" align="left">${first}</td>
<td colspan="1" align="left">${last}</td>
<td colspan="1" align="left">${company}</td>
<td colspan="1" align="left">${city}</td>
<td colspan="1" align="left">${postal}</td>
<td colspan="1" align="left">${country}</td>
<td colspan="1" align="left">${phone}</td>
<td colspan="1" align="left">${email}</td>
</tr>
</tbody>
</table>

<p></p>
<p style="font-size: larger;">Another text line in larger font.</p>
<p>Political divisions (also referred to as administrative divisions) ...</p>
Preview
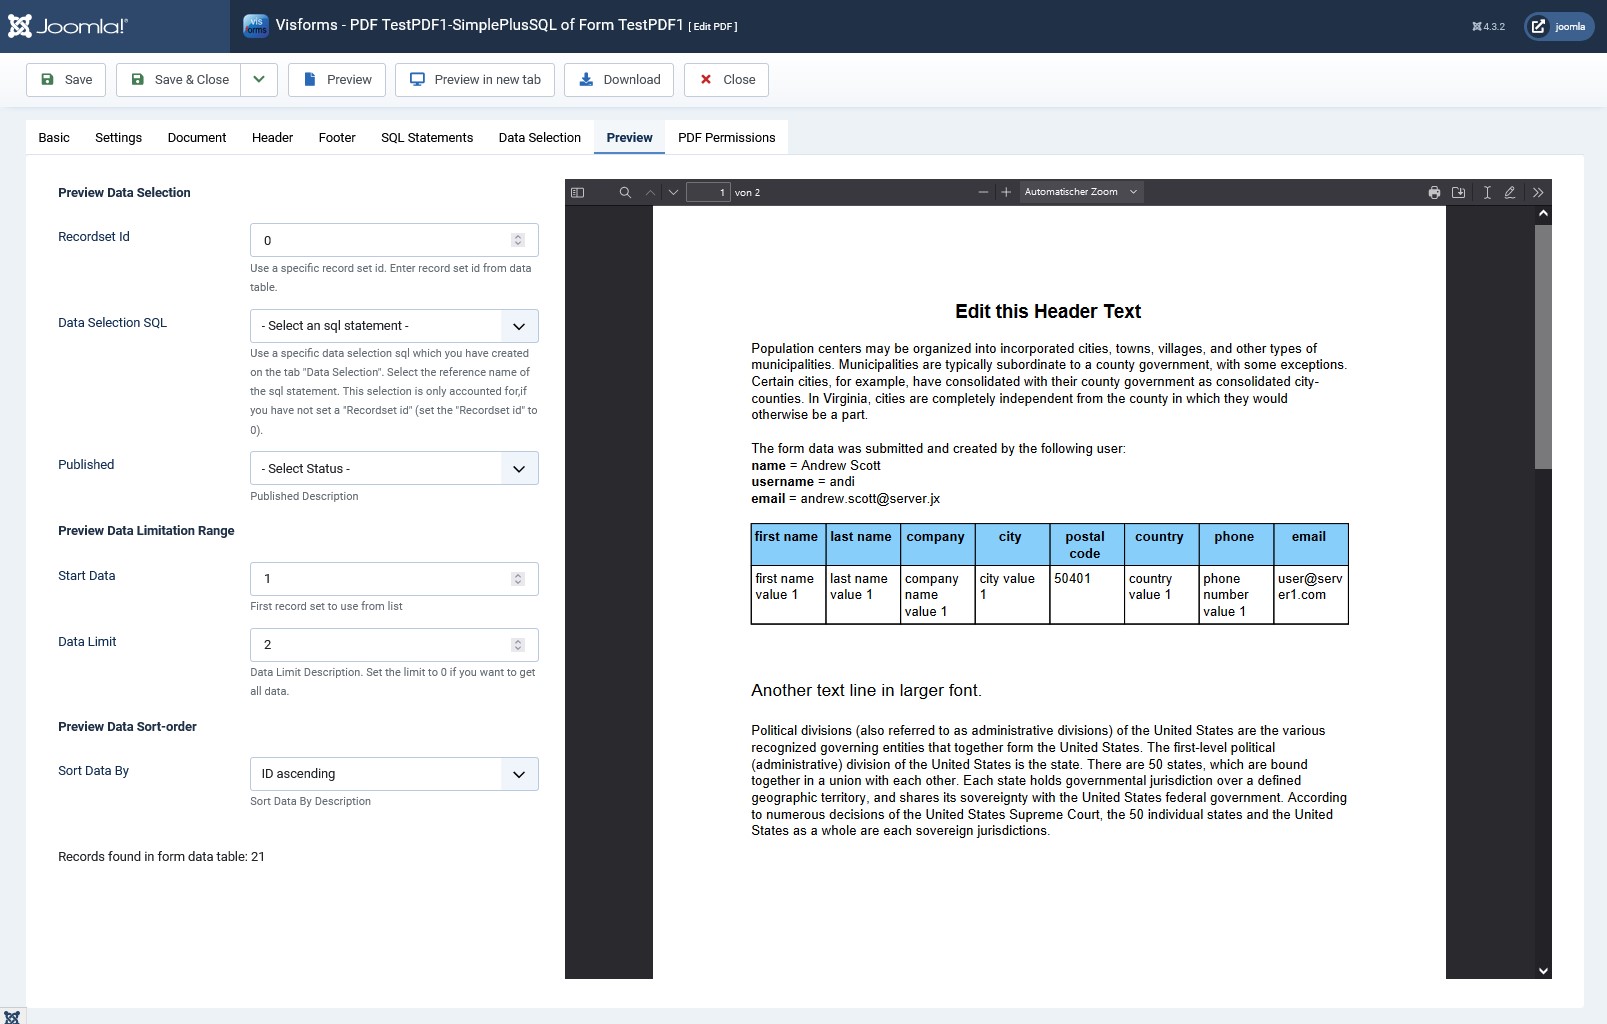
To see a preview in the administration, switch to the “Preview” tab of the same name. Click on the “Preview” menu button in the top menu bar. An embedded preview of the PDF document is now displayed here.
Note: When you click on the "Preview in new tab" menu button in the top menu bar, the preview is opened in a new tab in the web browser.
The finished PDF document then looks like this in the preview on the “Preview” tab.
The text contains the user information of the user who filled out and submitted the form.
