JavaScript Examples Part 1 for solving requirements with the Frontend Web Assets
Note: These features are part of the Visforms Subscription and are not included in the free Visforms version.
Calculate and display the cross sum of a number field
Subjects
The following topics are included in the example:
- Respond to user changes.
- Determining the numeric values of number fields.
- Address affected fields using their field ID.
- Output to a text field of the form.
- Only run code after the HTML document has been initialized.
Description
A form has, among other things, a number field and a text field. The text field has the Read-Only setting. If the user changes the value of the number field, the cross-sum should be recalculated and displayed in this text field in the form.
The form
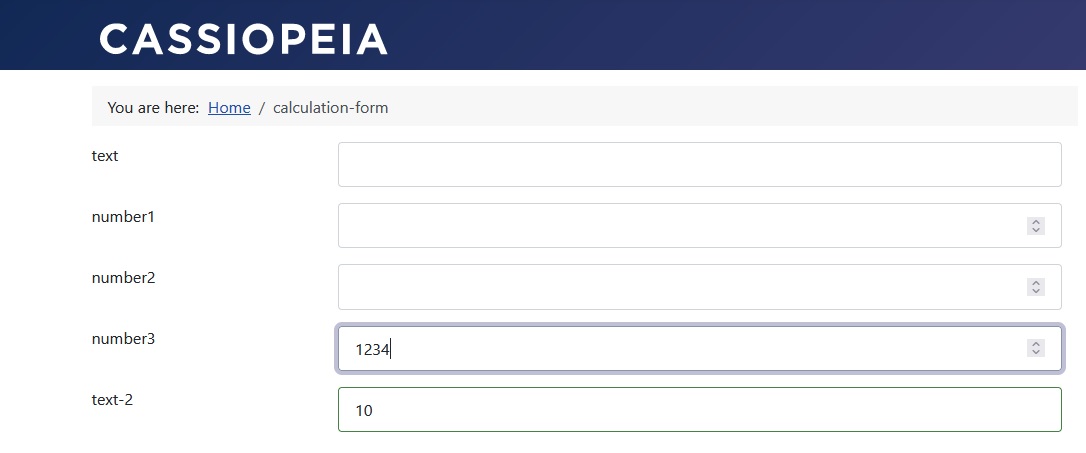
The form configuration

The JavaScript code
// calculate cross sum
jQuery(document).ready(function() {
	console.log('FEWA script loaded');
	// use the field IDs to connect to the form fields
	let fieldIDNumber = 76;
	let fieldIDText   = 459;
	jQuery('#field' + fieldIDNumber).on('change', function(e) {
		// user changed the value in the form
		const value = jQuery(this).val();
		jQuery('#field' + fieldIDText).val(crossSum(value));
	});
});
function crossSum(number) {
	// calculate the cross sum
	let sum = 0;
	let rest = number;
	while (rest > 0) {
		let next = rest % 10;
		sum = sum + next;
		rest = (rest - next) / 10;
	}
	return sum;
}
Conditional fields with logical AND
Subjects
The following topics are included in the example:
- Only run code after the HTML document has been initialized.
- Respond to user changes.
- Address affected fields using their field ID.
- Address radio fields by name.
- Control the display of fields.
Description
The ability to link conditional fields with a logical AND does not exist in Visforms as a simple configuration. In principle, this requirement can be easily implemented with some custom JavaScript code.
Any other scenarios, including significantly more complex logical conditions, can be implemented in the same way.
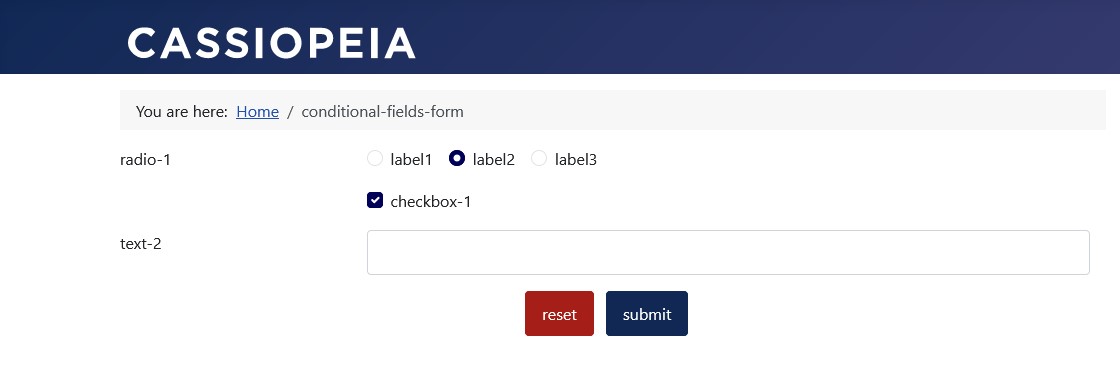
Below is an example of a logical AND between a check box and a radio button:
- Text field 'text-1' is configured as a conditional field of 'radio-1'.
- Text field 'text-2' is configured as a conditional field of 'checkbox-1'.
- Text field 'text-3' is controlled solely by the JavaScript code.
- Text field 'text-3' is only displayed if the radio field and checkbox field have the “correct” settings.
If text field 'text-3' is hidden, no data for the field will be transferred when the form is submitted.
Form with no user selection

Form with first user selection

Form with second user selection
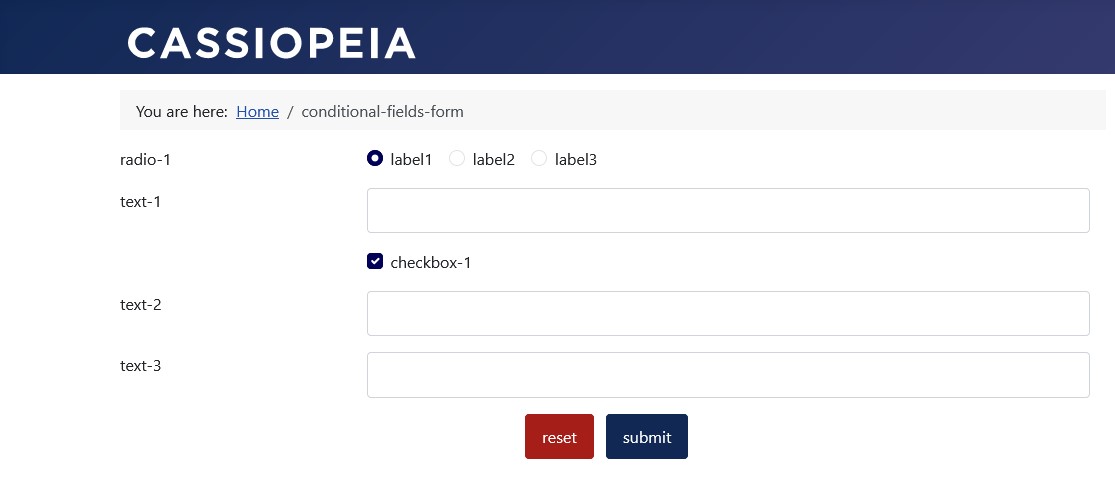
Form with third user selection
Form configuration
The JavaScript code is inserted in the form configuration, “Frontend Webassets” tab. Since this is the form display, you have to use the “Form” tab there. Enter the JavaScript code in the “JavaScript” field.
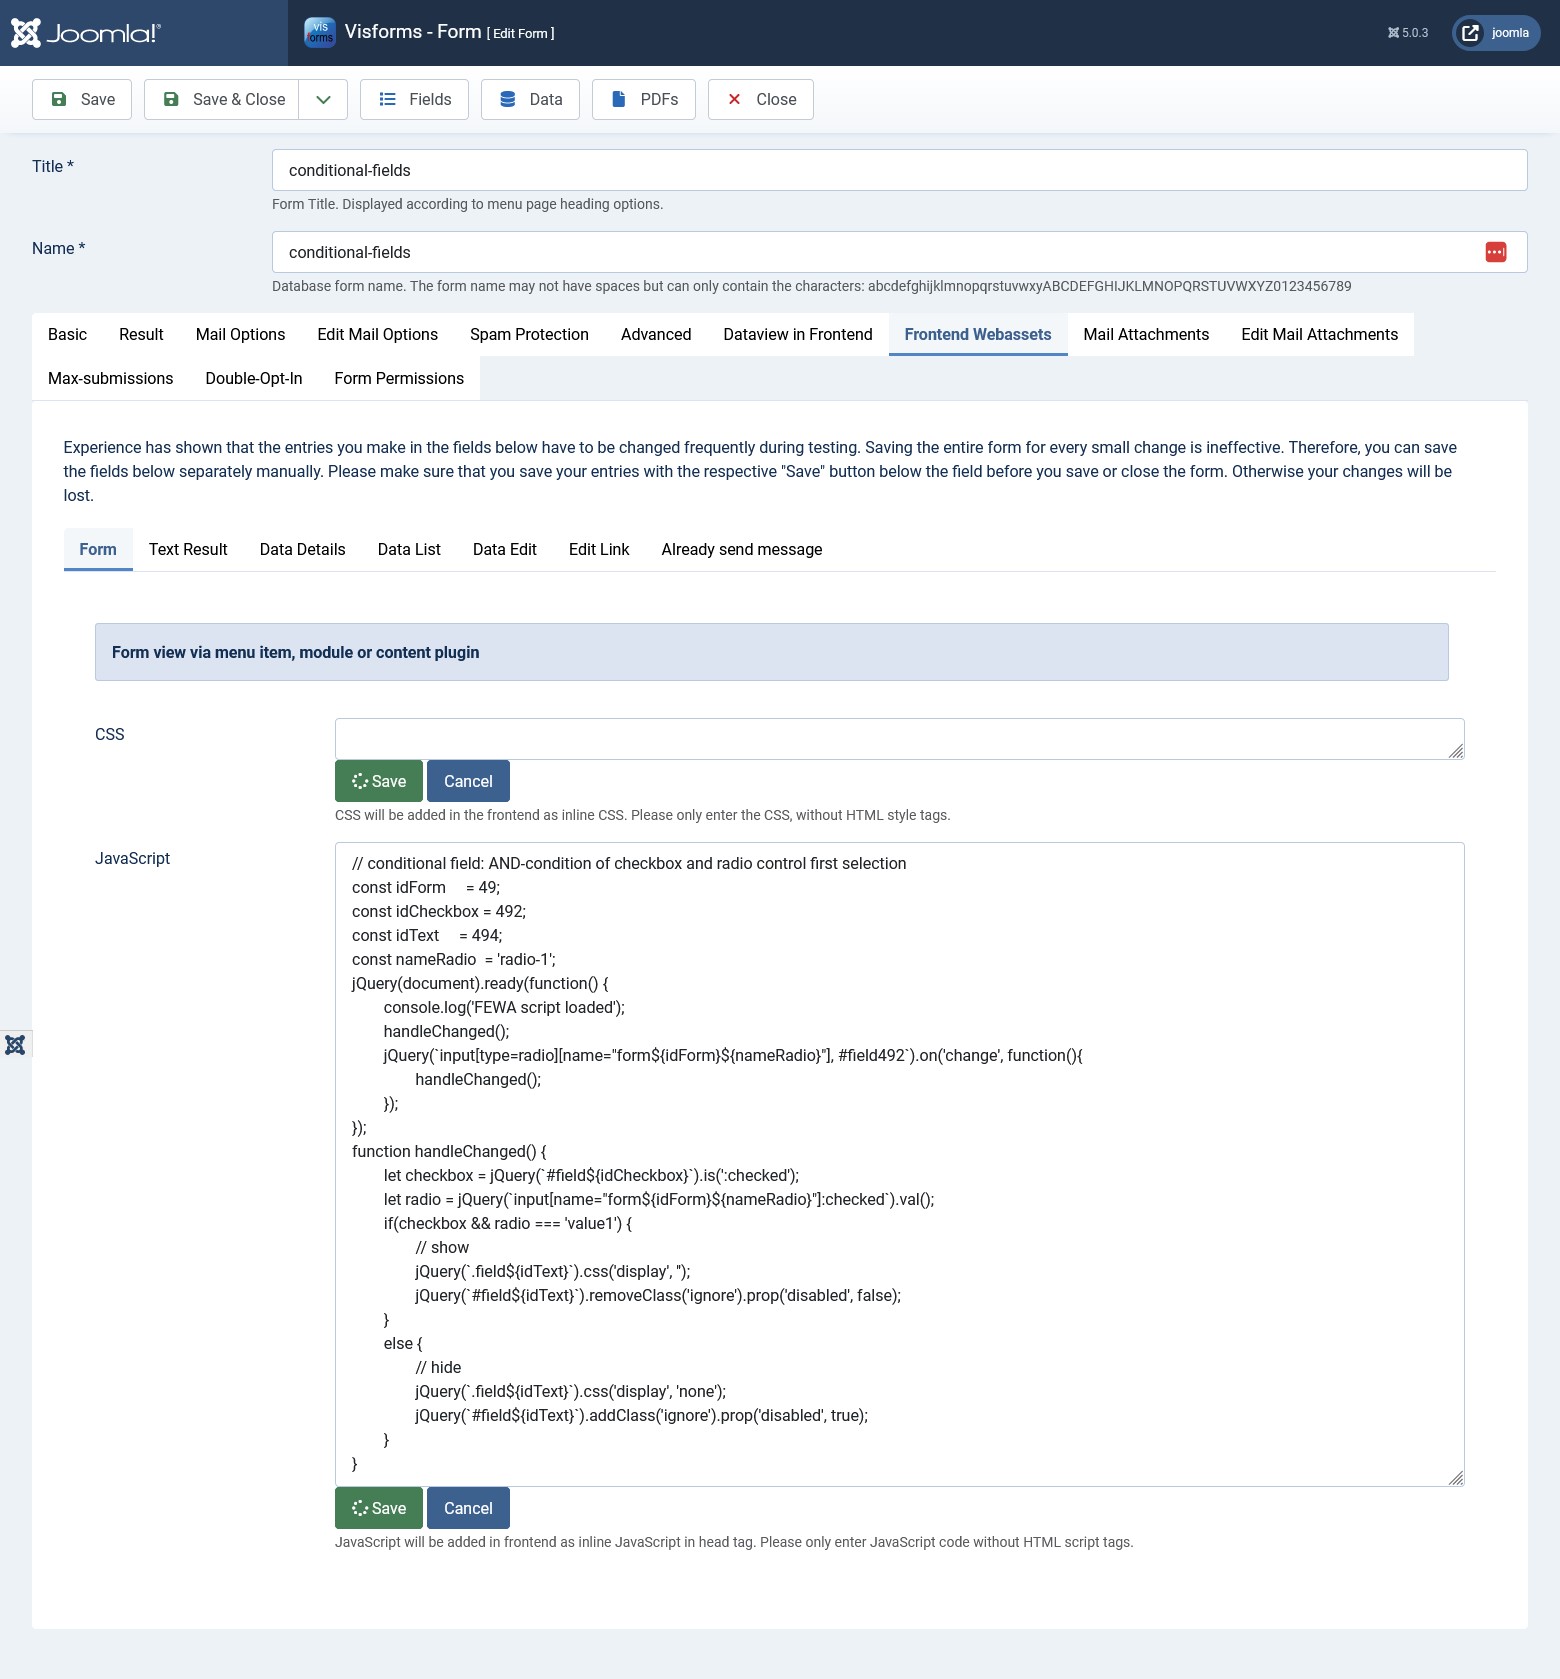
The JavaScript code
/// conditional field: AND-condition of checkbox and radio control first selection
const idForm     = 49;
const idCheckbox = 492;
const idText     = 494;
const nameRadio  = 'radio-1';
jQuery(document).ready(function() {
	console.log('FEWA script loaded');
	handleChanged();
	jQuery(`input[type=radio][name="form${idForm}${nameRadio}"], #field492`).on('change', function(){
		handleChanged();
	});
});
function handleChanged() {
	let checkbox = jQuery(`#field${idCheckbox}`).is(':checked');
	let radio = jQuery(`input[name="form${idForm}${nameRadio}"]:checked`).val();
	if(checkbox && radio === 'value1') {
		// show
		jQuery(`.field${idText}`).css('display', '');
		jQuery(`#field${idText}`).removeClass('ignore').prop('disabled', false);
	}
	else {
		// hide
		jQuery(`.field${idText}`).css('display', 'none');
		jQuery(`#field${idText}`).addClass('ignore').prop('disabled', true);
	}
}
Select time for text field
Subjects
The following topics are included in the example:
- Only run code after the HTML document has been initialized.
- Integration of a third-party JavaScript library.
- Initialize a selected form field based on its field ID.
Description
There is no special field of type “Time” in Visforms. Such a special field of the “Time” type would be provided with many conceivable options for setting and more precisely limiting the times that can be selected. It would also be provided with various settings for the time format and similar topics.
With little effort and a short, clear code, the same thing can be achieved directly with JavaScript code:
- A simple form field of type “Text” is used as the input field.
- The user receives a list of possible times to choose from.
- All settings regarding the selectable time or the time format are made simply and directly in the JavaScript code.
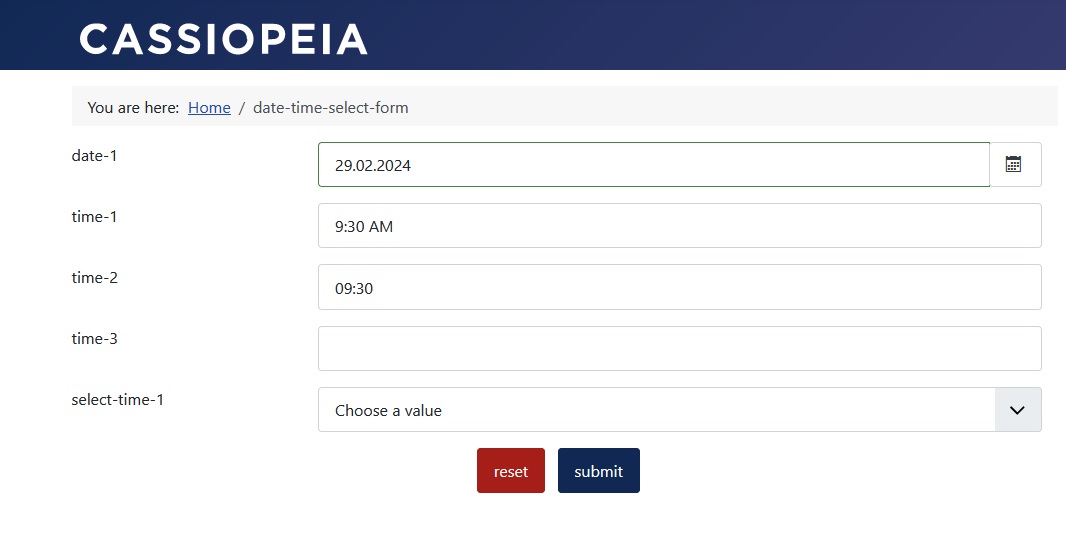
Form with time fields
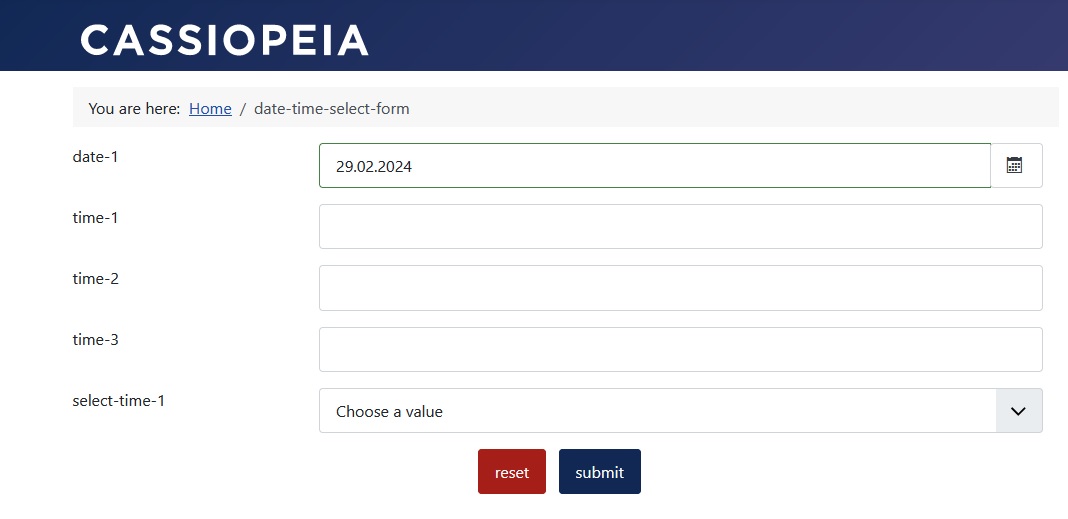
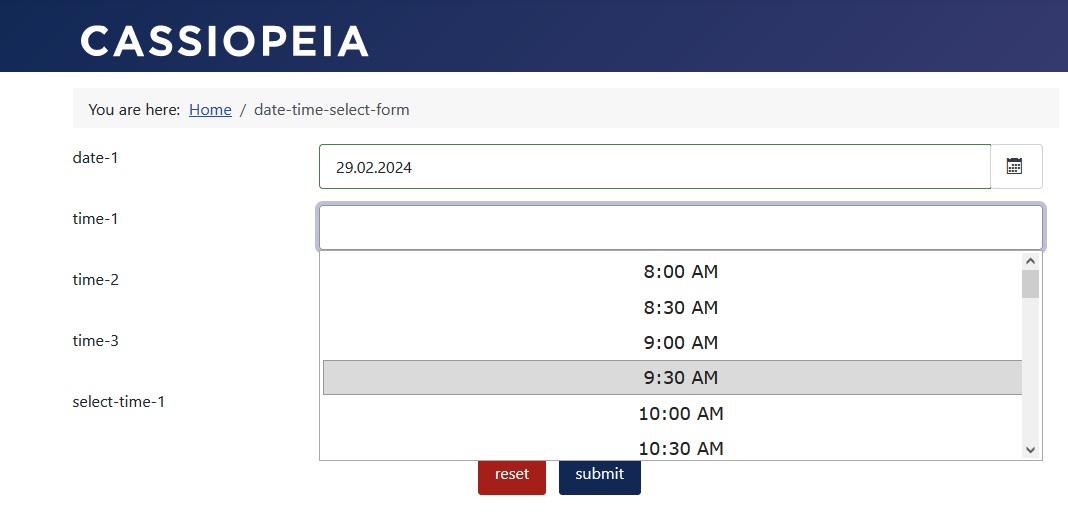
Field time-1 with format “AM/PM”
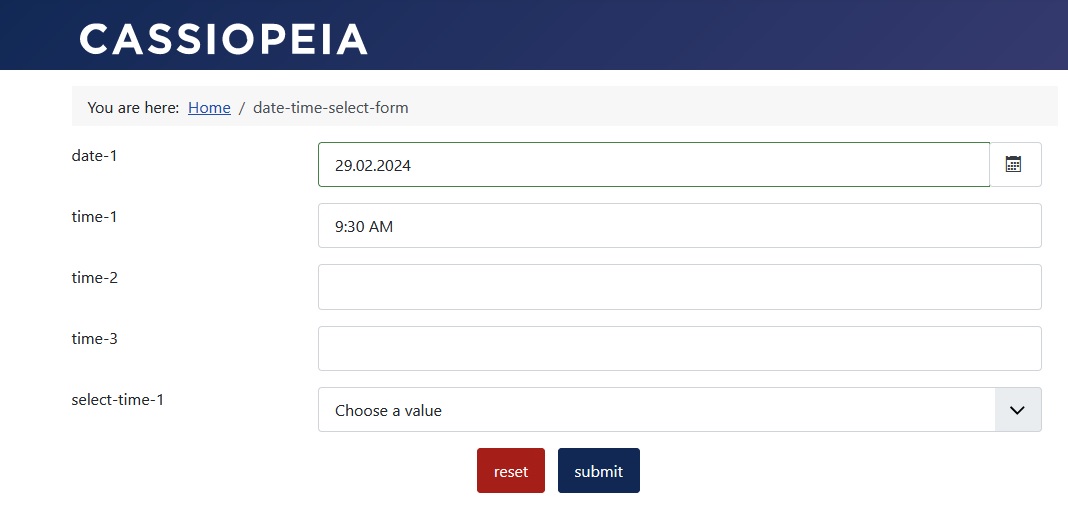
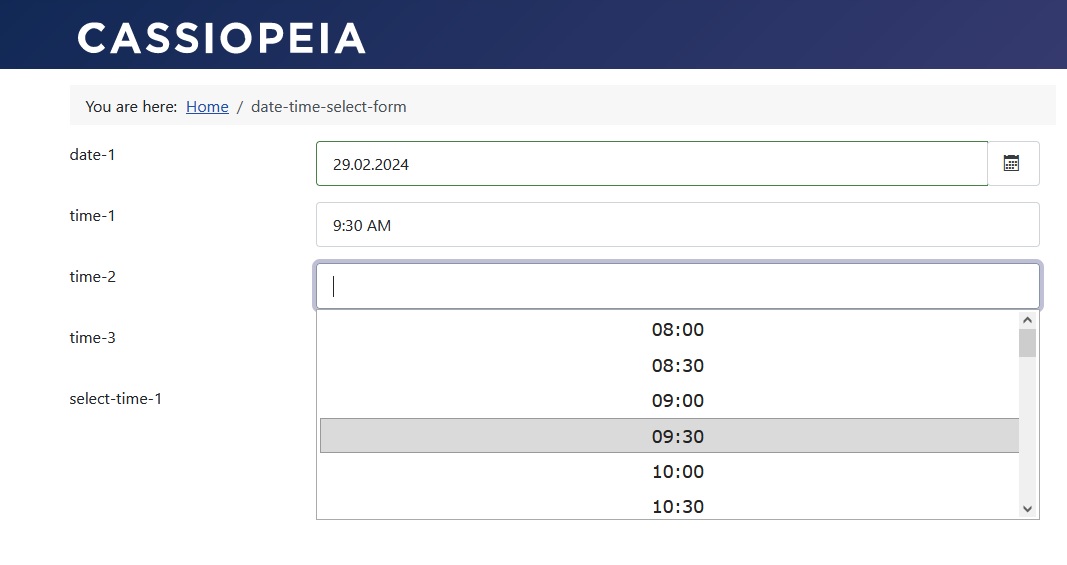
Field time-2 with format “24 hours”
The JavaScript code
According to the set values in the JavaScript code, times are displayed in the list boxes for selection:
- in the respective time format timeFormat,
- in 30 minute increments interval,
- from 8 a.m. minTime,
- until 10 p.m. maxTime.
// load the timepicker library
jQuery("<link/>", {
    rel: 'stylesheet',
    type: 'text/css',
    href: '//cdnjs.cloudflare.com/ajax/libs/timepicker/1.3.5/jquery.timepicker.min.css'
}).appendTo("head");
jQuery("<script/>", {
    src: '//cdnjs.cloudflare.com/ajax/libs/timepicker/1.3.5/jquery.timepicker.min.js'
}).appendTo("head");

// initialize and configure fields
jQuery(document).ready(function() {
    console.log('FEWA script loaded');

    // field 'time-1' with 12 hour format
    const fieldID1 = 498;
    jQuery(`#field${fieldID1}`).timepicker({
        timeFormat: 'h:mm p',
        interval: 30,
        minTime: '8:00am',
        maxTime: '10:00pm',
        dynamic: false,
        dropdown: true,
        scrollbar: true
    });

    // field 'time-2' with 24 hour format: fix start and end time
    const fieldID2 = 499;
    jQuery(`#field${fieldID12}`).timepicker({
        timeFormat: 'HH:mm',
        interval: 30,
        minTime: '8:00',
        maxTime: '22:00',
        dynamic: false,
        dropdown: true,
        scrollbar: true,
    });
});
Select time for text field with at least 3 hours offset
Subjects
The following topics are included in the example:
- Integration of a third-party JavaScript library: jQuery Timepicker
- Only run code after the HTML document has been initialized.
- Respond to user changes.
- Control the way a field of type Text is displayed.
- Initialize a selected form field based on its field ID.
- Calculating a time offset with the JavaScript Date object.
Description
This is an extension of the previous example above to select a time for a text field.
In addition to selecting the possible times, the selection is further restricted:
The first selectable time for the current day should be 3 hours in the future.
The selection of the date is included in the solution:
- The form starts with a disabled time field.
- Only after a date has been selected is the time field available for input.
- If the date is reselected, the entry made in the time field will be reset.
The current day must be treated specifically, as the time advance of 3 hours offset must also be applied here. On all other days, the selection of the time limit is determined solely by the configuration of the start time minTime and end time maxTime.
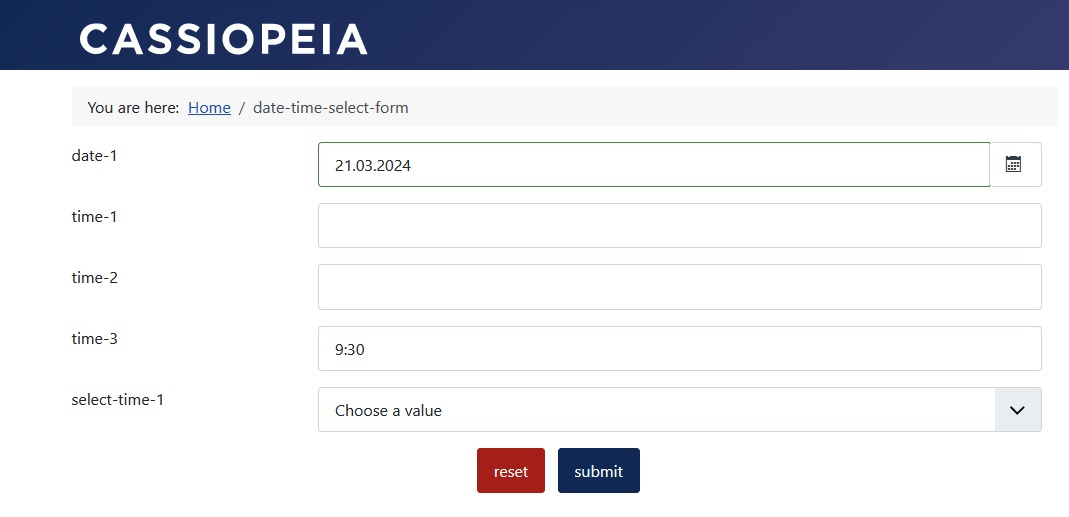
Field time-3 with 3 hour offset
The time selection for this example was performed at 12:20 p.m. The first possible selectable time in the list box is therefore at 3:30 p.m.
Start of the form
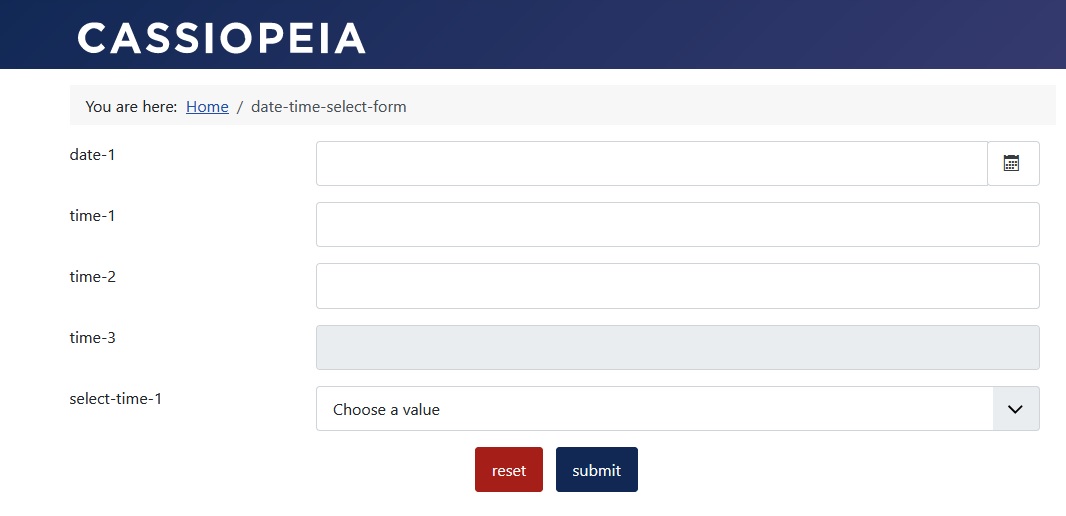
Today selected as date
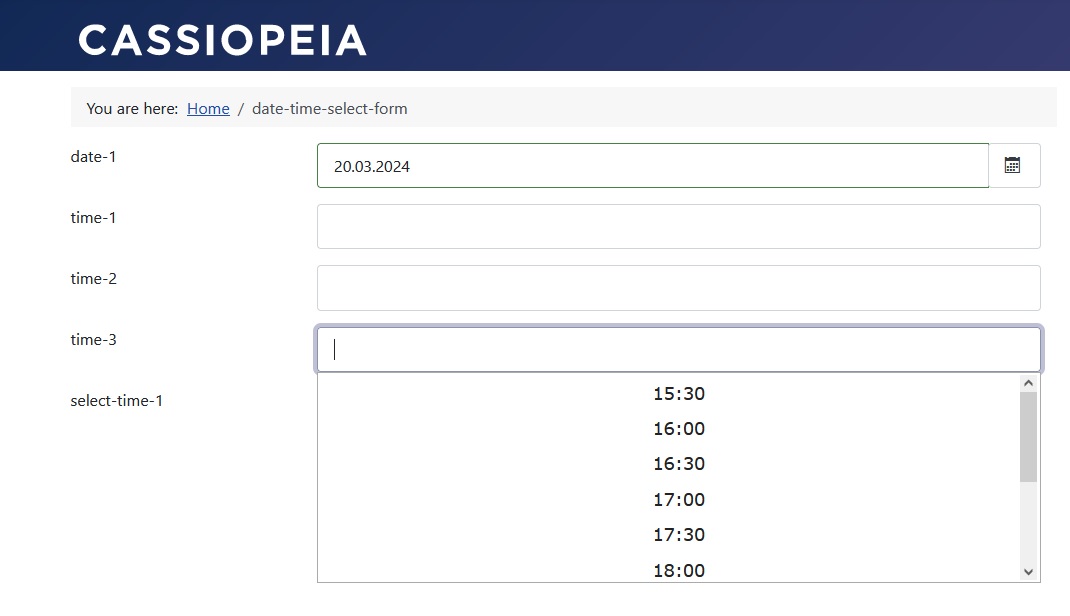
Tomorrow selected as date
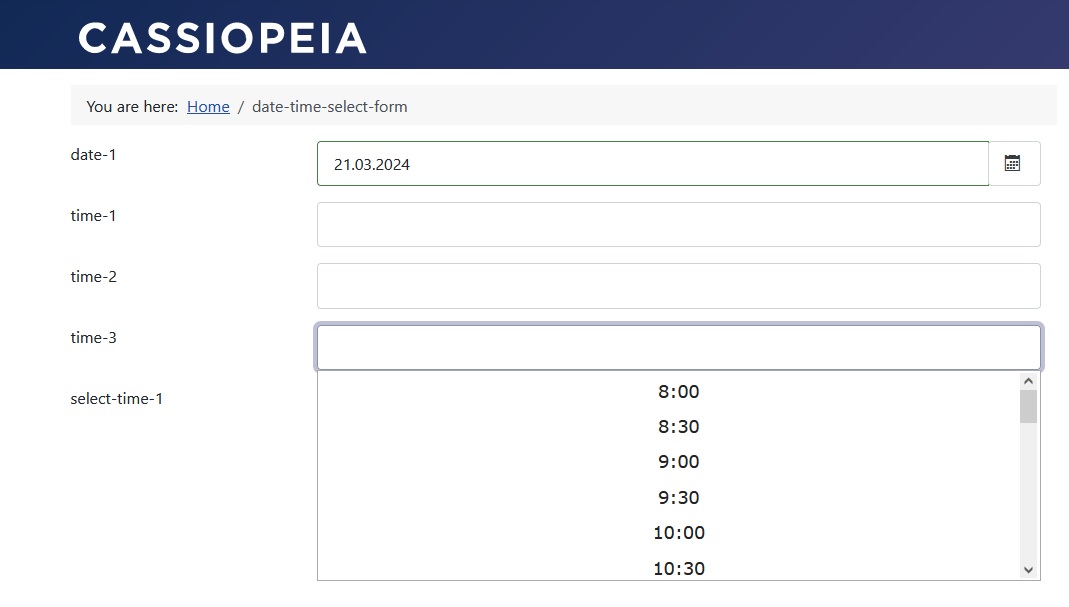
Time selected
Form configuration
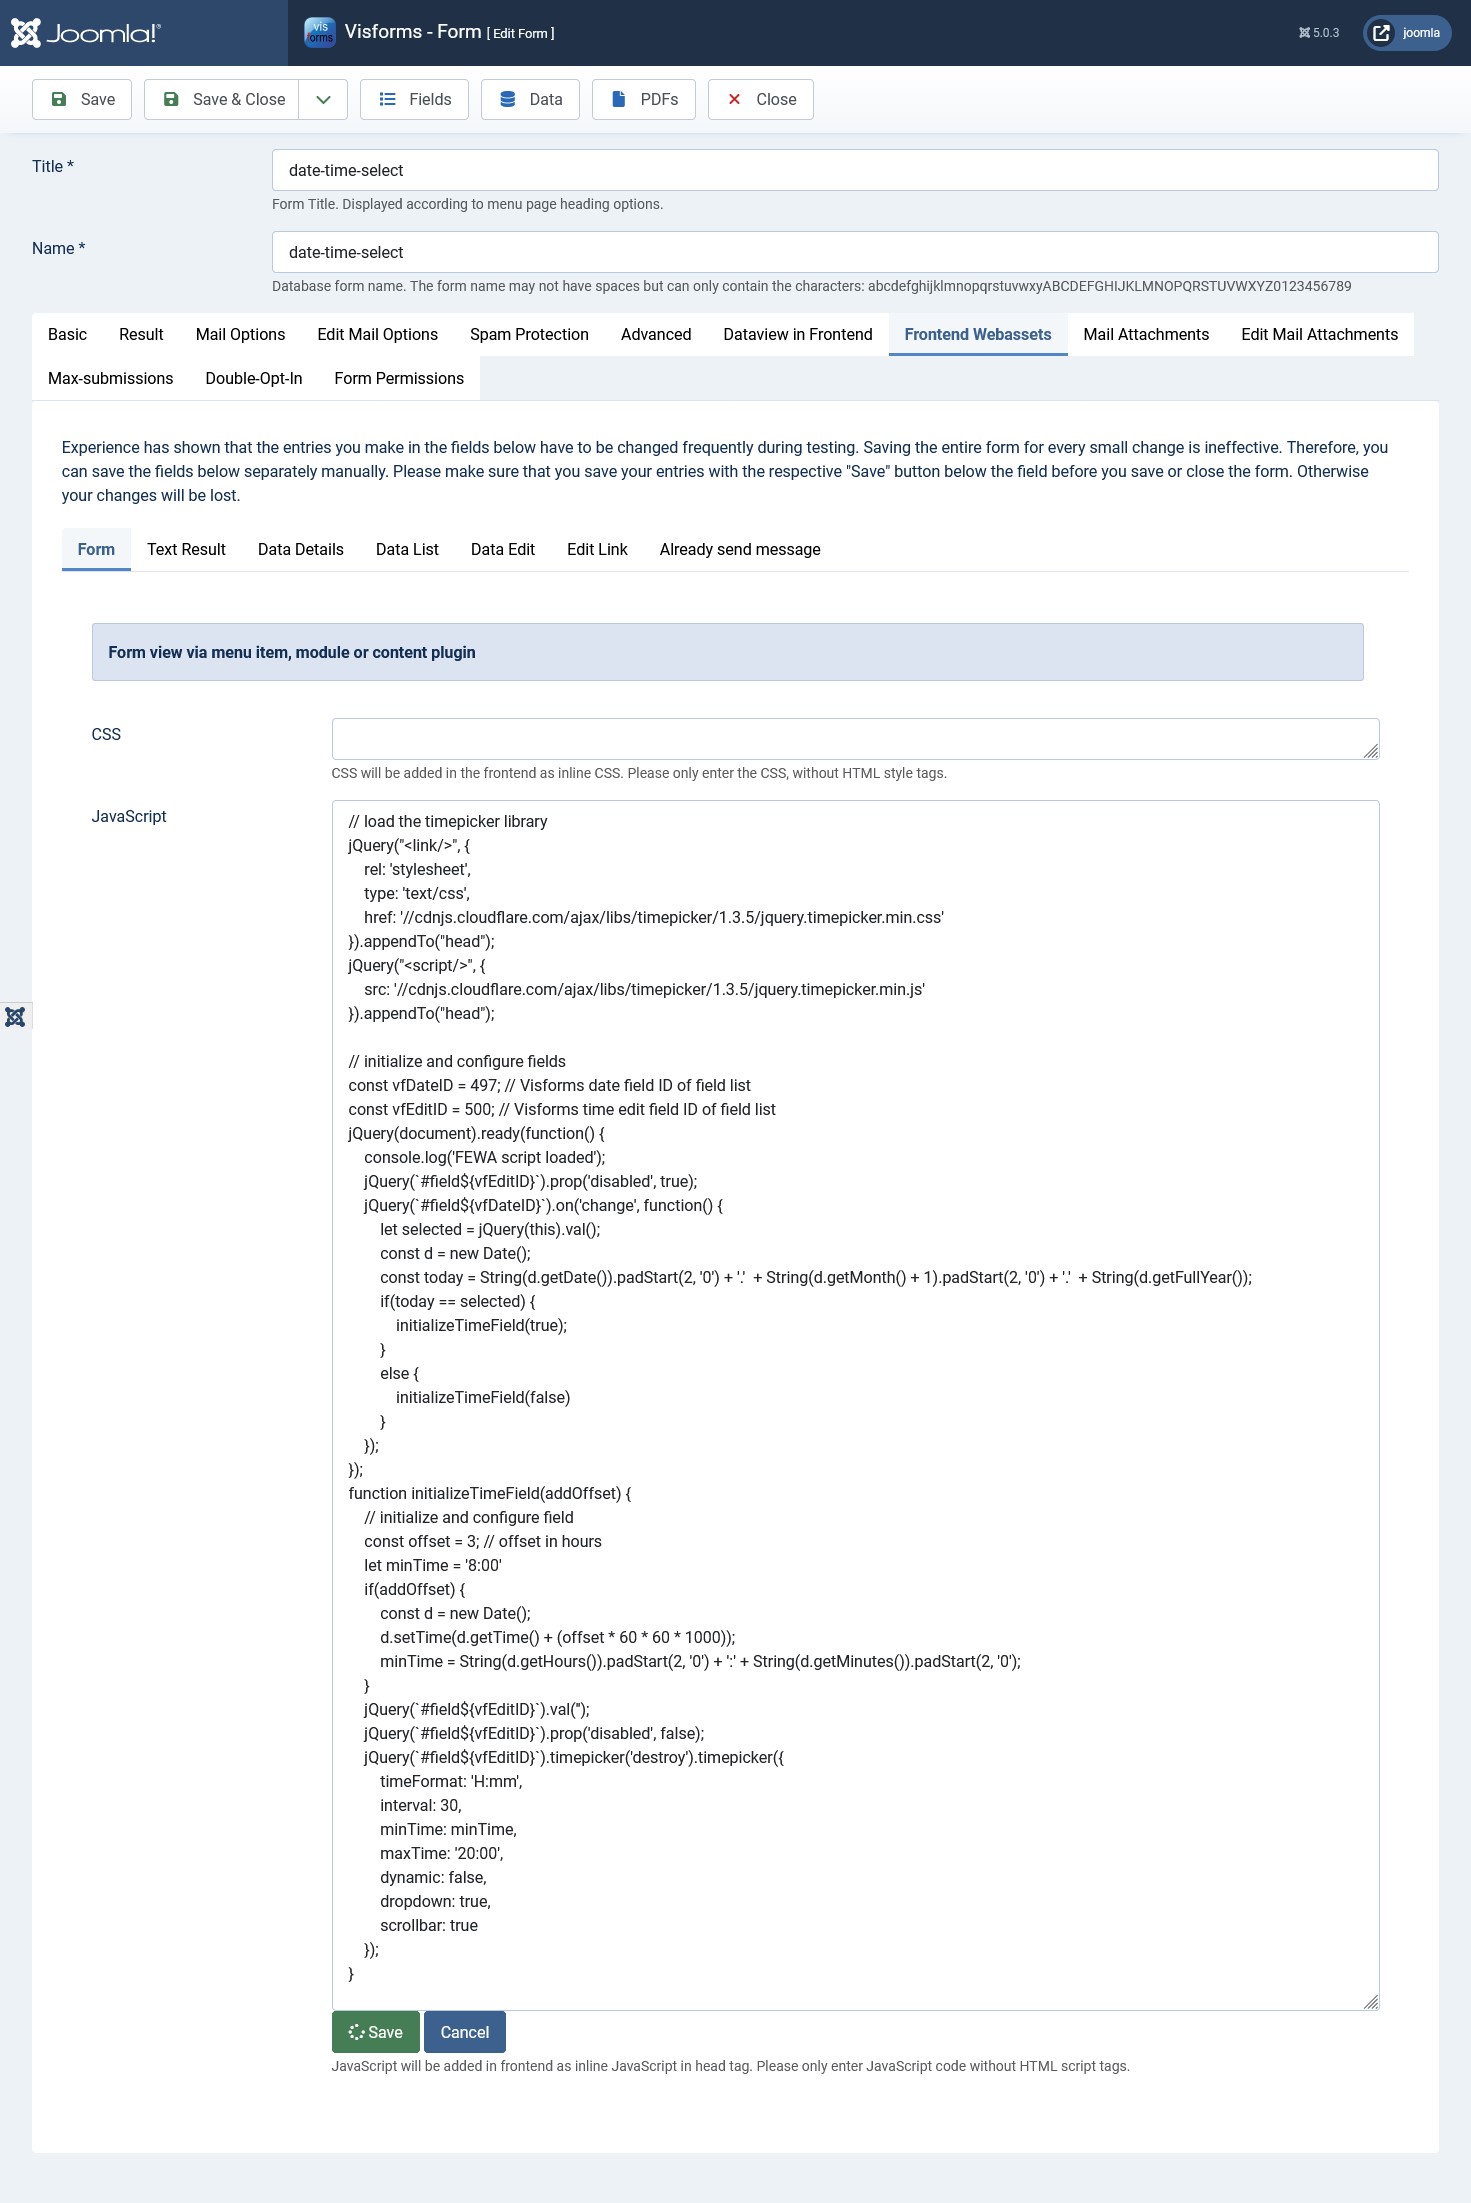
The JavaScript code is inserted in the form configuration, “Frontend Webassets” tab. Since this is the form display, you have to use the “Form” tab there. Enter the JavaScript code in the “JavaScript” field.
jQuery time picker
The JavaScript library jQuery Timepicker is a jQuery plugin. It is used to expand standard form input fields. It helps users to select from predefined times.
It has a Documentation with live configurator and a Explanation of possible configuration options.
The JavaScript code
According to the set values in the JavaScript code, times are displayed in the list boxes for selection:
- in the respective time format timeFormat,
- in 30 minute increments interval,
- from 8 a.m. minTime,
- until 8 p.m. maxTime,
- at least 3 hours in the future offset.
// load the timepicker library
jQuery("<link/>", {
    rel: 'stylesheet',
    type: 'text/css',
    href: '//cdnjs.cloudflare.com/ajax/libs/timepicker/1.3.5/jquery.timepicker.min.css'
}).appendTo("head");
jQuery("<script/>", {
    src: '//cdnjs.cloudflare.com/ajax/libs/timepicker/1.3.5/jquery.timepicker.min.js'
}).appendTo("head");

// initialize and configure fields
const vfDateID = 497; // Visforms date field ID of field list
const vfEditID = 500; // Visforms time edit field ID of field list
jQuery(document).ready(function() {
    // console.log('FEWA script loaded');
    jQuery(`#field${vfEditID}`).prop('disabled', true);
    jQuery(`#field${vfDateID}`).on('change', function() {
        const selected = jQuery(this).val();
        const d = new Date();
        const today = String(d.getDate()).padStart(2, '0') + '.'  + String(d.getMonth() + 1).padStart(2, '0') + '.'  + String(d.getFullYear());
        if(today == selected) {
            initializeTimeField(true);
        }
        else {
            initializeTimeField(false);
        }
    });
});
function initializeTimeField(addOffset) {
    // initialize and configure field
    const offset = 3; // offset in hours
    let minTime = '8:00';
    if(addOffset) {
        const d = new Date();
        d.setTime(d.getTime() + (offset * 60 * 60 * 1000));
        minTime = String(d.getHours()).padStart(2, '0') + ':' + String(d.getMinutes()).padStart(2, '0');
    }
    jQuery(`#field${vfEditID}`).val('');
    jQuery(`#field${vfEditID}`).prop('disabled', false);
    jQuery(`#field${vfEditID}`).timepicker('destroy').timepicker({
        timeFormat: 'H:mm',
        interval: 30,
        minTime: minTime,
        maxTime: '20:00',
        dynamic: false,
        dropdown: true,
        scrollbar: true
    });
}
The following adjustments to your situation are necessary:
- const vfDateID = 497 The Visforms date field ID from the field list.
- const vfEditID = 500 The Visforms text field ID from the field list.
- const offset = 3 The offset in hours.
- let minTime = ‘8:00' The earliest selectable time of day.
- maxTime: ‘20:00' The latest selectable time of day.
- interval: 30 The time interval of the selectable times of day in minutes.
Progress display for multi-page forms with your own texts
Subjects
The following topics are included in the example:
- Only run code after the HTML document has been initialized.
- Detect HTML elements of the form.
- Added new text to HTML elements of the form.
Description
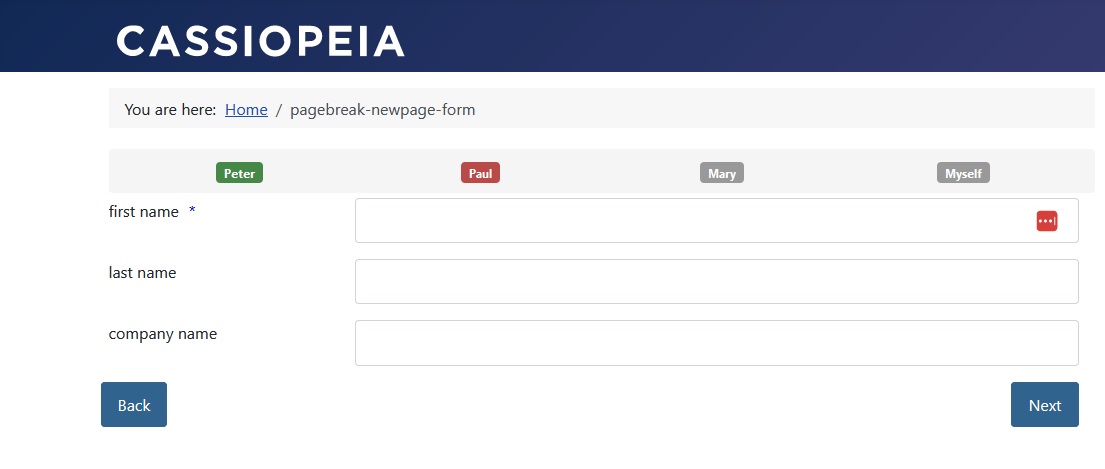
The progress display of the form should be provided with your own texts. Visforms has two options for displaying the progress of multi-page forms. The texts of the representation are numbered consecutively in both cases.
It is possible to give the individual step elements their own texts with very little JavaScript code.
The form
The form configuration
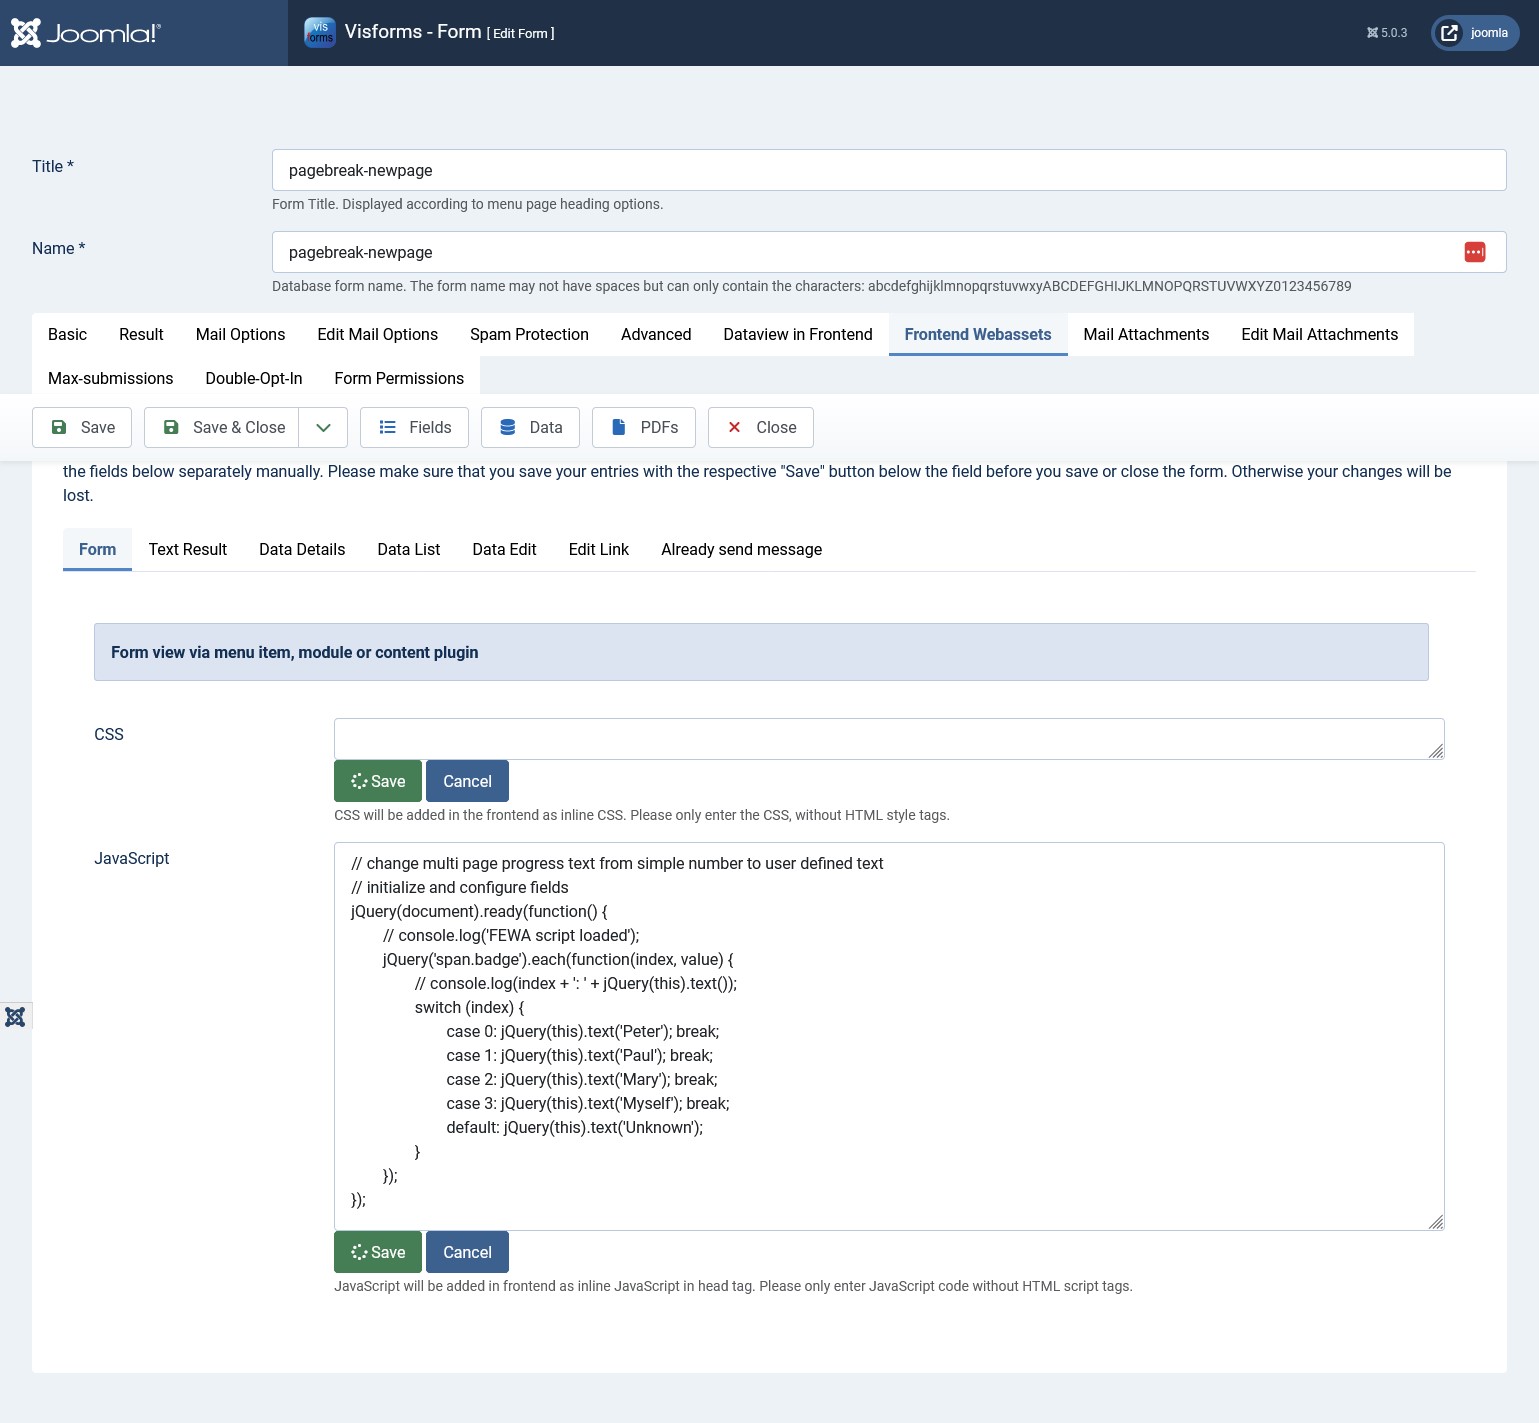
The JavaScript code
Note: The code uses the order of the individual pages in ascending direction. The first element has index 0.
// change multi page progress text from simple number to user defined text
// initialize and configure fields
jQuery(document).ready(function() {
    // console.log('FEWA script loaded');
    jQuery('span.badge').each(function(index, value) {
        // console.log(index + ': ' + jQuery(this).text());
        switch (index) {
            case 0: jQuery(this).text('Peter'); break;
            case 1: jQuery(this).text('Paul'); break;
            case 2: jQuery(this).text('Mary'); break;
            case 3: jQuery(this).text('Myself'); break;
            default: jQuery(this).text('Unknown');
        }
    });
});
The number of selected options for multiple selection
Subjects
The following topics are included in the example:
- Only run code after the HTML document has been initialized.
- Respond to user changes.
- Determine the selected options of a multiple selection list box.
- Address affected fields using their field ID.
- Output to a text field of the form.
Description
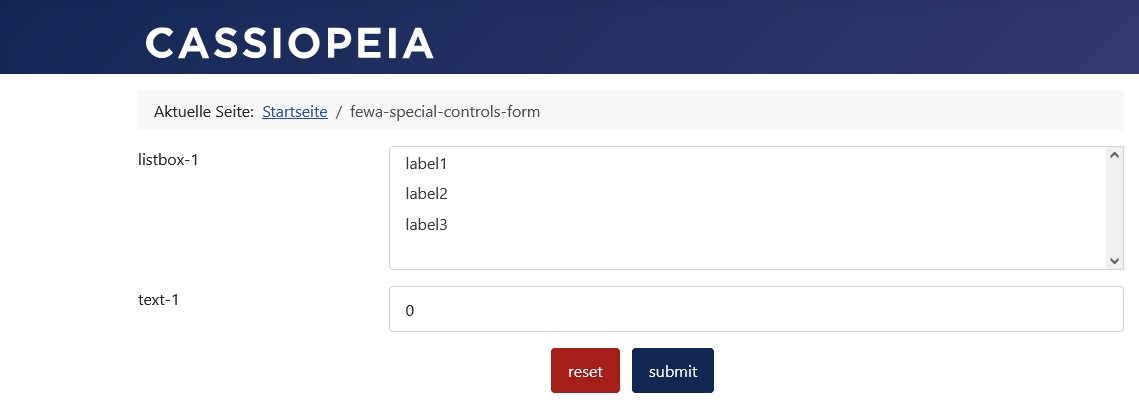
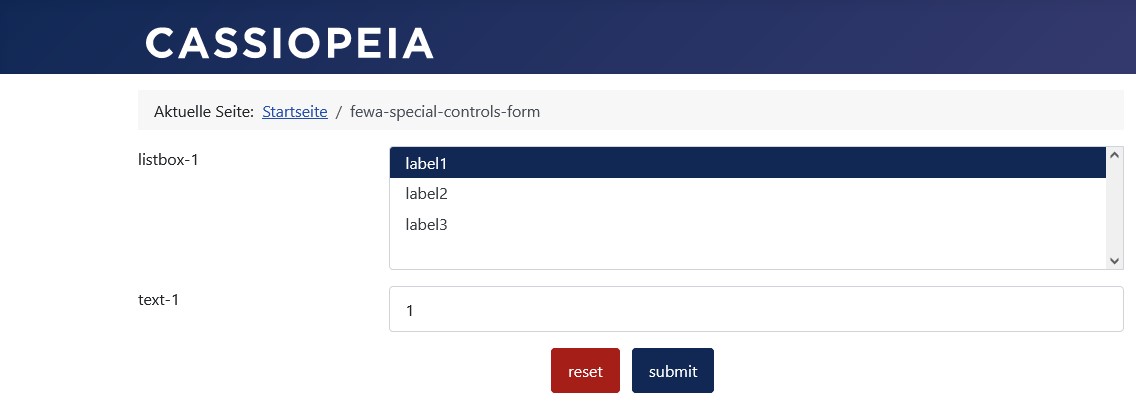
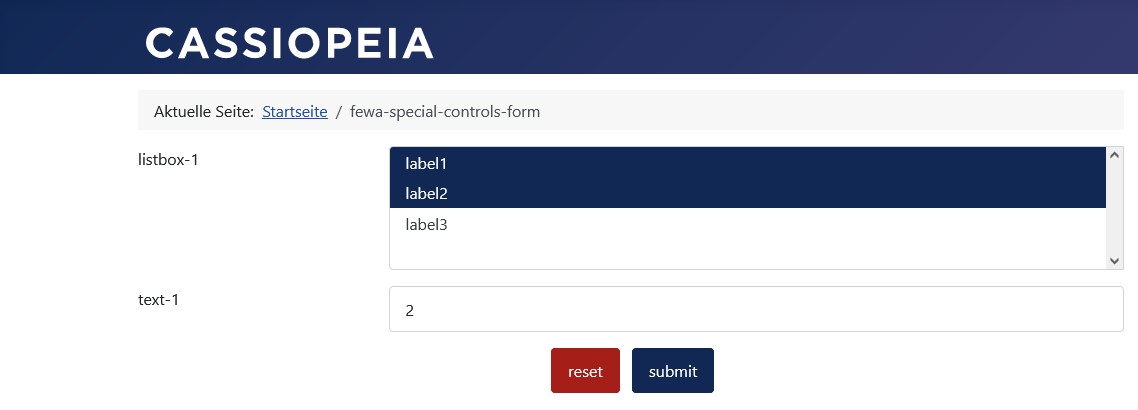
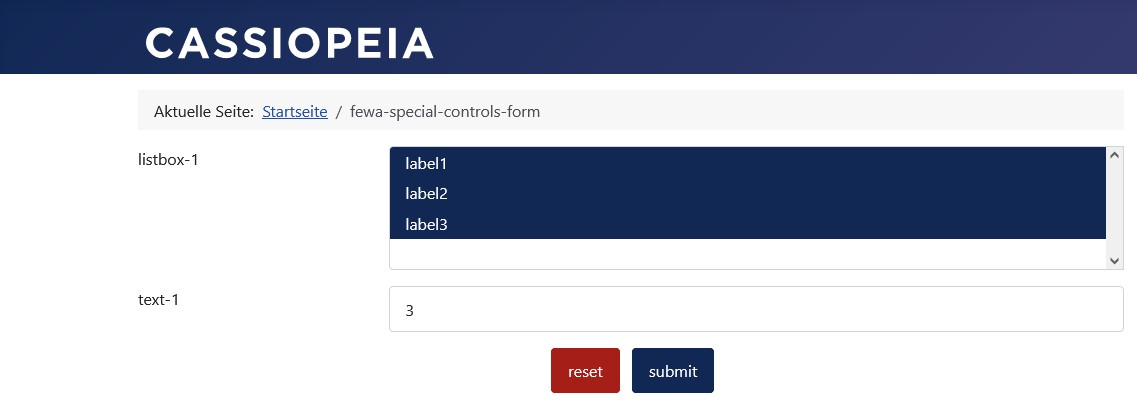
Determine the number of selected options in a multiple selection list box. Direct output of the number in a text field of the form.
The form
In the following form, more options are successively selected.
The number of options selected is immediately displayed in the text field.
However, you can also do anything different with the value.
The form configuration
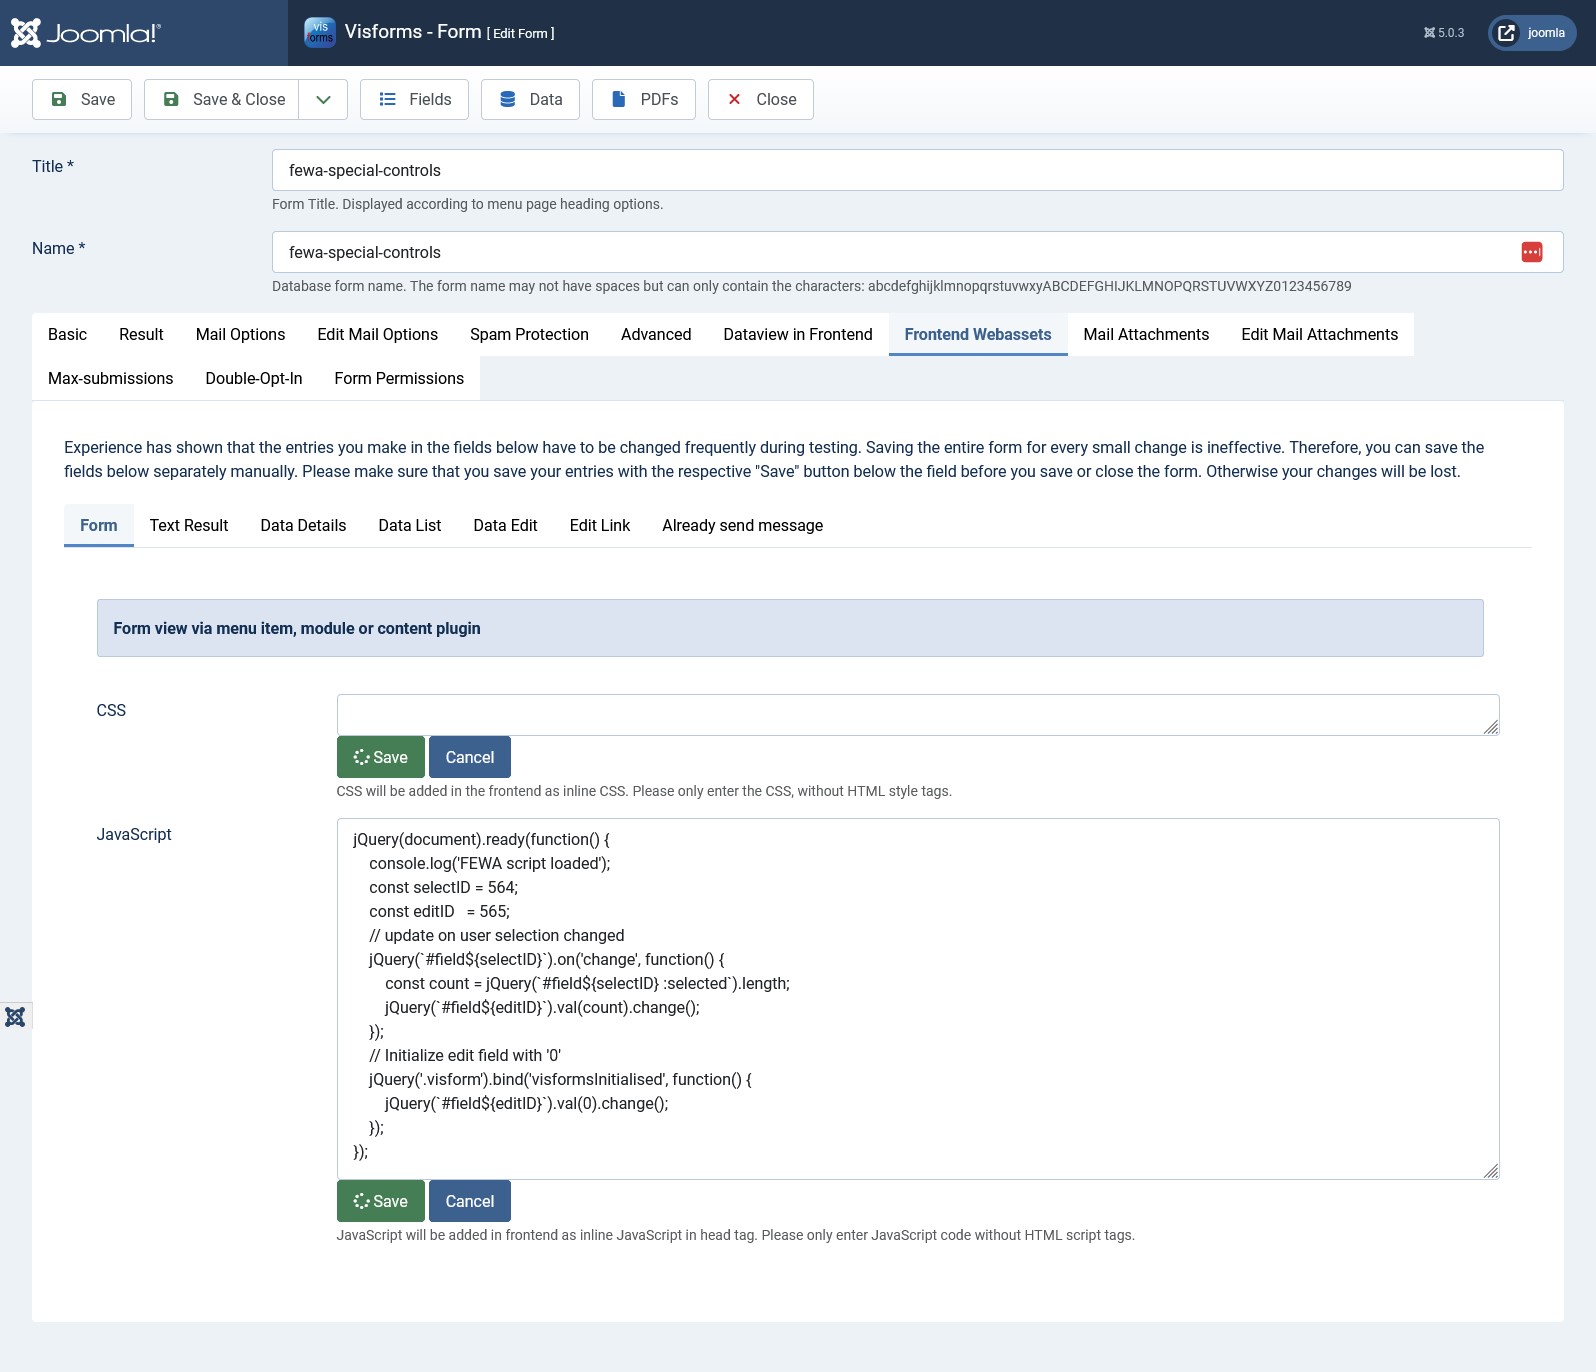
The JavaScript code
jQuery(document).ready(function() {
    console.log('FEWA script loaded');
    const selectID = 564;
    const editID   = 565;
    // update on user selection changed
    jQuery(`#field${selectID}`).on('change', function() {
        const count = jQuery(`#field${selectID} :selected`).length;
        jQuery(`#field${editID}`).val(count).change();
    });
    // Initialize edit field with '0'
    jQuery('.visform').bind('visformsInitialised', function() {
        jQuery(`#field${editID}`).val(0).change();
    });
});
The following adjustments to your situation are necessary:
- const selectID = 564 The Visforms field ID from the field list of the multiple selection listbox.
- const editID = 565 The Visforms field ID from the field list of the text field for output.